Crape 'Murder'

How to Properly Prune Crape Myrtles
Every year, typically in January and February, you can hardly drive down the street without seeing Crape Myrtle trees that have been incorrectly pruned year after year after year. Sometimes, they may just be large trees that have been cut back to the base. More often, you see large 'knuckles' at the end of each stalk. This is a result of being cut back to the same place each year and is called 'pollarding'. However it presents itself, these are all forms of what is typically referred to as Crape 'Murder' in the landscape industry.
If looking to select a Crape Myrtle, the first order of business would be to carefully pick a variety that will not outgrow the area that you will be planting it in. There are many different sizes of this plant, varying from 2-3' high and wide to 25-30'! This is a large range and can often lead to pruning issues down the road if not selected correctly. Also keep in mind any signage, power lines, or other obstacles that may end up being a nuisance.If you have a tree that you have to cut way back each year because of visibility issues, you may want to consider removing and replacing with a more viable option.
If you already have a tree in place, what is the best way to prune it? Crape Myrtles DO bloom on new growth each year. However, you don't have to cut it back to waist level in order to create new growth. In fact, if you cut it back that far, the plant has to spend quite a bit of new energy each season pushing out new growth before it can bloom. In contrast, if you simply cut off old blooms or only prune back to 8-10" above last year's cut, the plant can focusing more energy on thickening it's branches and pushing blooms.
Ultimately, you should try to prune your tree in the shape of an ice cream cone. Look for the 'three D's': Dead, Diseased, or Dying branches within the structure of the tree. Also, it's very important to remove crossing branches that are rubbing against each other. These create open wounds that are prime targets for pests or diseases. Keep the one that adds to the shape and form of the tree and remove the other at it's base. This is also a good time to look for any straggler branches that are growing the wrong direction or that take away from the form of the tree. Also, use this time to remove the little branches along the trunk that you can typically just pull off by running your hand along the trunk.
Once you have cleaned out the unwanted and nuisance branches, it's time to shape the top of the tree. If the tree is too tall to reach the top, then don't worry about it. Just let it be a tree! (It will bloom, I assure you). If there are branches that need to be removed, follow them all the way to the base and cut them out there. This would be preferred over 'topping' the tree. If you concentrate on cleaning up the interior of the tree, it will be healthy and ready for the growing season.
If you are pruning for the first time, just concentrate on removing the old seed pods and pruning off any branches that are smaller than a pencil. If you pruned the tree last year, make your cuts approximately 8-10" higher than last year's marks. Try to concentrate on main leaders and remember to keep the overall shape at the top 'rounded' like the top of a cone. Once these cuts are made, you may need to clean out some of the smaller branches that are left near the top so that the canopy is open. Once leafed out, this is important to allow for airflow and sunlight penetration.
If you follow a good pruning program with your Crape Myrtles, especially when they are young and getting established, it will lead to a more attractive growth habit, stronger branches, better blooms, and natural disease and pest resistance. Just say 'no' to Crape 'Murder'!
Basic Planting Tips

The fall and early winter are great times of the year to plant. The weather is cooler, putting less stress on the plants; there is typically more natural rainfall to help with watering; and roots can still develop as long as the soil temperature is above 40 degrees. This means that the plants will have a head start on getting established for the heat of the summer.
Let's take a look at a few basic planting tips to help you get started on your way to a healthy landscape!
Prepare the Area
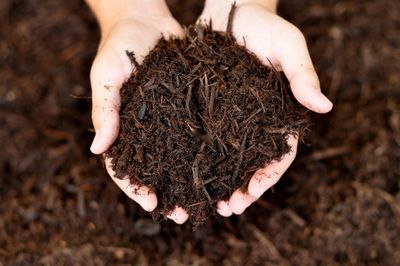
Remove any existing grass and obstacles form the area that you are going to plant. This is also a good time to till to loosen up the ground and amend the soil with nutrients such as fertilizer, compost, or other organic material. Make sure that the grade allows for proper drainage and water flow away from structures.

Dig the Holes
As you dig the holes for each plant, make sure that the hole is approximately twice as wide as the root ball. Do NOT plant the plant too deep, in fact you are better off leaving about 1/8 of the root ball above grade so that it does not get buried under mulch or drowned in water. This is also a good time to add some compost or organic material in the bottom of the hole for nutrients.
Cut Girdled Roots
Container plant roots typically grow around the plant over time. This is called 'girdling'. It is a good idea to cut through them in several places to keep them from wrapping around and choking the plant out. This pruning also stimulates new root growth.
Time to Plant
Once you have cut through the roots and amended the soil, carefully place the plant into the hole. Start to backfill the dirt back into the hole, going around the edges of the root ball. Make sure that you tamp the dirt as you go, using your foot or a shovel to reduce the amount of settling that will occur. As previously mentioned, leave a little of the root ball showing above grade so that it is not planted too deep.

Water, Water, Water!!
Did I mention water? The initial watering is part of the process that often is left out but is the most critical step. Each plant needs to be watered all the way around to the point of runoff. It would not hurt to go through and water everything twice if you can. Not only does this provide water to help the roots and reduce stress for the plant, but most importantly it helps the soil settle and eliminates the air pockets down in the ground to ensure that the soil is firmly and protectively packed around the root ball.
Mulch
Lastly, it is necessary to install some type of mulch media. This can be shredded hardwood mulch, pine straw, nuggets, etc. The purpose is to protect the roots from the sun while helping retain moisture for the plant to use. It also adds aesthetic value for the project and gives it the completed look. The goal with any type of mulch is to not have more than 3" of material on top of the roots and do not pile mulch up against the trunk or stalks of the plants because that can lead to decay or rot.
Early Spring Turf Care

Hopefully you read our blog on 'Winter Turf Care' (below) and have already applied your first application to your turf. Well, don't look now but the second application is right around the corner! Did you miss the first one? It's not too late to get started, but hurry because time is running out to pre-emerge for that pesky crabgrass. Just remember that any applications that you put down have to be spread 6-8 weeks apart, per the label. Don't try to double up because that could damage your grass and also put too much chemical into the environment.
Round 2 applications typically occur in late March to early April. This is the second dose of pre-emergent chemical and also some fertilizer, depending on what type of grass that you have. If you have Bermuda grass, you will remember that in Round 1 we said not to fertilize because you don't want to promote 'green-up' too soon. Well, this application is when you want to start getting fertilizer on it as the temperature is warming up and it needs to be fed. Something with a little higher Nitrogen content (the first number on a bag of fertilizer) will do nicely, like an 18-0-2 with Prodiamine (pre-emergent). This will help supprt plant health by feeding it during the transition period.
If you have Fescue grass, it should have gotten Nitrogen with the firdt application in February, so we are going with a lower Nitrogen product that has a higher rate of Potassium (the third number on the bag) to help support root health. Look for a product like a 5-0-10, also with Prodiamine. This will help get the plant nice and strong for the upcoming summer heat and also keep it healthy to choke out any weeds that may try to invade.
As always, let us know if you have any questions or if we can help you out with your lawn this year!
Late Winter Turf Care

"It's 28 degrees outside! Why should I be thinking about my grass?"
I would not be surprised if this or a similar comment just went through your mind when you read the title of this blog entry. Yes, it is cold, and yes, there is not much going on with your grass right now. At least that you can SEE. However, pesky weed seeds are laying in wait for the temperatures to get a little warmer, then....BOOM! Weeds everywhere. At that point, you have largely missed the window for control for the year. The timing for this application is very important!
So, how do you get on top of the weeds before they get the jump on you? The answer is to put down a type of chemical called a pre-emergent. Like the name suggests, this chemical will keep seeds from emerging. In order to be effective, however, it has to go down BEFORE the seeds have germinated. Which is late January to mid-late February depending on the year and the weather. Like any other chemical, pre-emergents have a shelf life so it is most effective to apply them at a 1/2 rate over two applications approximately six weeks apart. This will give you weed suppression control into the late summer, when you want the pre-emergent to break down so that you can aerate and overseed your Fescue lawns. BE CAREFUL about applying pre-emergents to any areas that you are planning on seeding in the spring. They are not selective about what seeds they do or do not suppress and you will inadvertently keep your Fescue seed from growing.
If you have a Bermuda lawn, the February application will have a very low to no fertilization content because you do not want to encourage green-up yet. If you have Fescue, this first application will have some fertilizer in it along with the pre-emergent to start feeding for the spring. The second application in Bermuda around the first of April will need to have fertilizer in it along with your second 1/2 dose of pre-emergent.
If weeds are already present, pre-emergents WILL NOT control them. At this point, you also have to apply a post-emergent weed control based on the type of weed that you have (broadleaf or grassy). As its name implies, this type of chemical controls weeds after they have already germinated. You may need to use both in conjunction if you lawn has gotten a little out of control.
Please keep in mind that this is a PROCESS. Like any living thing, your grass (and the things living in it) take time to correct. It may take several applications over a few months to really start to see the results in some cases. Please be patient and stick to the program and I promise that you WILL be able to get everything back under control.
But, don't wait. This is a very important time of year for your lawn's success. Give us a call if we can help with YOUR lawn!
How's and why's of mulching
All you ever wanted to know about mulch (and more!)
'When do I need to put down mulch?' 'What type of mulch do we need?' 'How much mulch should we use?'
These are all questions that many customers have involving the mulch process on their properties each year. There are actually several factors that go into making these decisions. To start, let's talk about why we even mulch plant beds to begin with. Also, for the purposes of this blog, 'mulch' refers to hardwood mulch AND pine straw.
The main reason that many people want mulch is because it makes the beds look better (and it certainly does!) However, it is very important for plant health because it provides protection for the roots from the sun and other elements and it also helps retain moisture for them to use to stay healthy and make food. Mulch and pine straw also provide a barrier to keep weed seeds from reaching the soil and also have natural chemicals in them that help suppress weed germination and growth.
In order to determine how much mulch to use, a good rule of thumb is to aim for a total of no more than 3 inches of material. If there is existing mulch in place, maybe only 1"-1.5" will suffice. If there are areas that dirt is showing, you may need 3". It is best to have a landscape professional come out and measure to make sure that you are getting the correct quantity. In some cases, with years of mulching a property, some removal of the old mulch may be necessary prior to putting down fresh material. Too much mulch on a shrub or tree can be more damaging that not having any!
As for what type of mulch that you should use: this often depends on preference , budget, and region that you live in. Pine straw is much more readily available in the south and is cheaper than hardwood mulch. However, the straw breaks down more quickly and may need to be applied two times per year instead of once like the hardwood mulch. Some customers simply prefer the look of one over the other. Both types of mulch still serve the same purposes mentioned above.
So, now that we've discussed the types of mulch and what they do for the plants, what is the best time of year to have it installed? You can actually mulch at any time of the year without doing any harm to the plants, as long as you do not put it down too thick. However, for most effective weed control, it is very important to put down a pre-emergent chemical to help form a barrier under the mulch to keep weeds from germinating. This needs to be done in the late winter prior to seeds developing for the season. Therefore, it makes most sense from a timing standpoint to mulch at this point. This will also have your mulch looking good for the growing season and enable you to focus on turf maintenance and quality. In addition, be careful about mulching in the fall, as the fall cleanup / leaf removal process can often inadvertently blow out freshly installed mulch and leave beds bare by the spring.
Want to know even MORE?? Give us a call or fill out the contact form today!
Winter Landscaping Ideas
Not many people think about their landscaping in the winter, but this is the perfect time of year to ensure that your landscape is set up for a successful spring and summer!
Plant Replacement - this is a good time of year to remove any dead or dying plant material and replace with new plantings. This will give the roots time to get established before the heat of the summer.
Bed Preparation - it is important to make sure that all leaves and debris are removed before applying preemergent weed control. This will ensure that the chemical will make good soil contact for maximum effectiveness. It is also a good time to get the weed control out before weeds are actively growing.
Hardwood Mulch and Pinestraw - both of these common types of mulch serve a few purposes: 1) they help retain moisture and shield plant roots from the sun, 2) chemicals in mulch help act as a natural weed inhibitor, and 3) they make your landscape more pleasing to the eye. Late winter is the best time for this process, most effectively in conjunction with preemergent chemical applications.
Soil Testing - knowing the pH and nutrient composition of your soil is very important when developing a turf fertilization program. If some of the balances are off, then many of the chemicals may not even be used by the plants or grass, costing you a lot of money and frustration. Not to mention putting a lot of chemicals back into the environment unnecessarily.
Hardscaping - any time of year is a good time to do hardscaping projects, but your landscape contractor will love doing this during the cooler weather for sure! Paver patios, fire pits, walkways. Retaining walls, seat walls, outdoor kitchens. If you can think of it, we can do it!
Pruning and Tree Limbing - while plants are dormant, this is the perfect time to do major cutting and renovation pruning. Overgrown plants can be brought back down to size, and trees can be limbed up and shaped. Look for the three "D's": dead, diseased, or dying branches. Get those out while there are no leaves to hide them.
Low Voltage Lighting - this can also be done any time of year, but often needs to be viewed in the dusk or dark. Since it gets dark earlier in the winter and there are no leaves to block the light, this is a good season to install lighting.
We here at Evolve Landscaping would love to to help you with any of these projects or more! Give us a call or shoot us an email today. Projects signed up in January and February are eligible for a discount. See the main page for more details!